For all RGB raster tiff exports it is possible to define a personalized color map. You have to active the "Color map" option in all concerned export.
Click on the /File/Preference menu and select the Export item.
If you activate the "Color map used for RGB color map exports" the color map defined in this panel is used and it replaces the color map automatically generated for each export.
If you click on the [Editor...] button the CMapEditor program starts.
The color maps files have the ".lcm" extension.
A color map is a file which contains the "RGB" description of 256 colors maximum. The color map is only available when you export the files. When a file uses a color map each pixel is associated to a color from the color map. The chosen color is the one which matches the best to the old color of the pixel.
You also can double click on the icon program (placed in the same directory where LorikPublisher has been installed) in order to run this program.
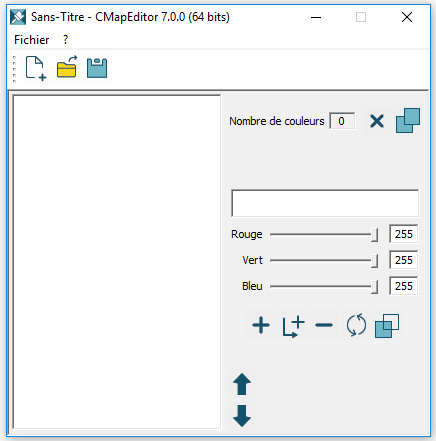
CMapEditor is made of one single window:
You can open several windows at the same time,
each one corresponding to one color map.
The list of the colors defined in the color map is displayed on the left.
All buttons used to modify (or create) the color map are located on the
right.
To load a color map file click File/Open menu
or use the following shortcut [Ctrl]+[O] or click  button.
A standard color map file named "standardWebColorMap.lcm" which contains 216 colors is located by default in LorikSoftware installation directory.
|
Adding a color |
|
Inserting a color |
|
Removing a color |
|
Applying modifications to a color |
|
Defining selected color as transparent |
|
Modifying color position |
|
Removing all colors |
|
Removing color transparency |
Click File/New menu or use the following shortcut [Ctrl]+[N] or click
 button.
A new panel is displayed in which you can:
1 - Defining its R, G, B values
2 - Click  button, color
is added to the list and automatically uses the smallest available number:
button, color
is added to the list and automatically uses the smallest available number:
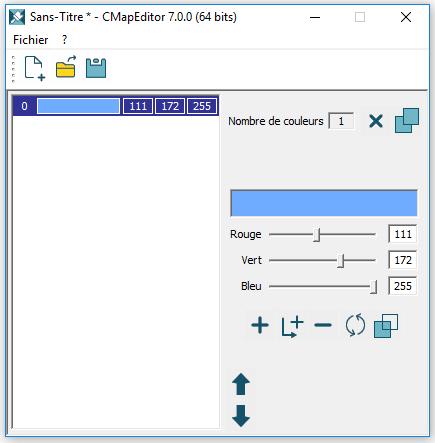
The color is displayed in the list with a sample of its aspect and its three RGB values.
Add others colors using the same procedure.
A color map can contain a maximum of 256 colors.
You can also choose to insert a color if you need this color to use a specific number. Click on the number that you want to associate to the new color.
Enter the RGB values and click on the  button.
The color takes the selected number and the number of the colors placed after are increased of 1 (2 becomes 3, 3 becomes 4, etc.)
Select the color you want to modify, change its RGB values and click
on the  button. The color is modified and the list is
updated.
button. The color is modified and the list is
updated.
If you define a color as transparent all pixels using this color will
be considered as transparent and will let appear the background color
of the web browser. Select the color in the list and click on the ![]() button.
button.
If you don't want to use a transparent color click on the ![]() button. You can only define
one transparent color per color map file.
button. You can only define
one transparent color per color map file.
Click File/Save... menu, or use [Ctrl]+[S] shortcut or click  button. If you save a file for the first time
a standard saving panel is displayed. Enter the name of the color map
and choose the saving directory then click on [OK].
button. If you save a file for the first time
a standard saving panel is displayed. Enter the name of the color map
and choose the saving directory then click on [OK].
The color map files have the ".lcm" extension.
Use the File/Save as... menu if you want to save the color map file with a new name.
At any time if you want to cancel the modifications you have made, click on the File/Revert to saved version menu (Ctrl + U). The color map will be loaded with the parameters it had at the last saving.

